Affiliate Panel
Admin Panel Config
Admin Panel Access:
Access the admin panel and navigate to the "Settings" section.

Activate Affiliate Status:
Enable the "Affiliate Status" option in the settings to automatically add the affiliate feature to the user panel for seamless affiliate program management.
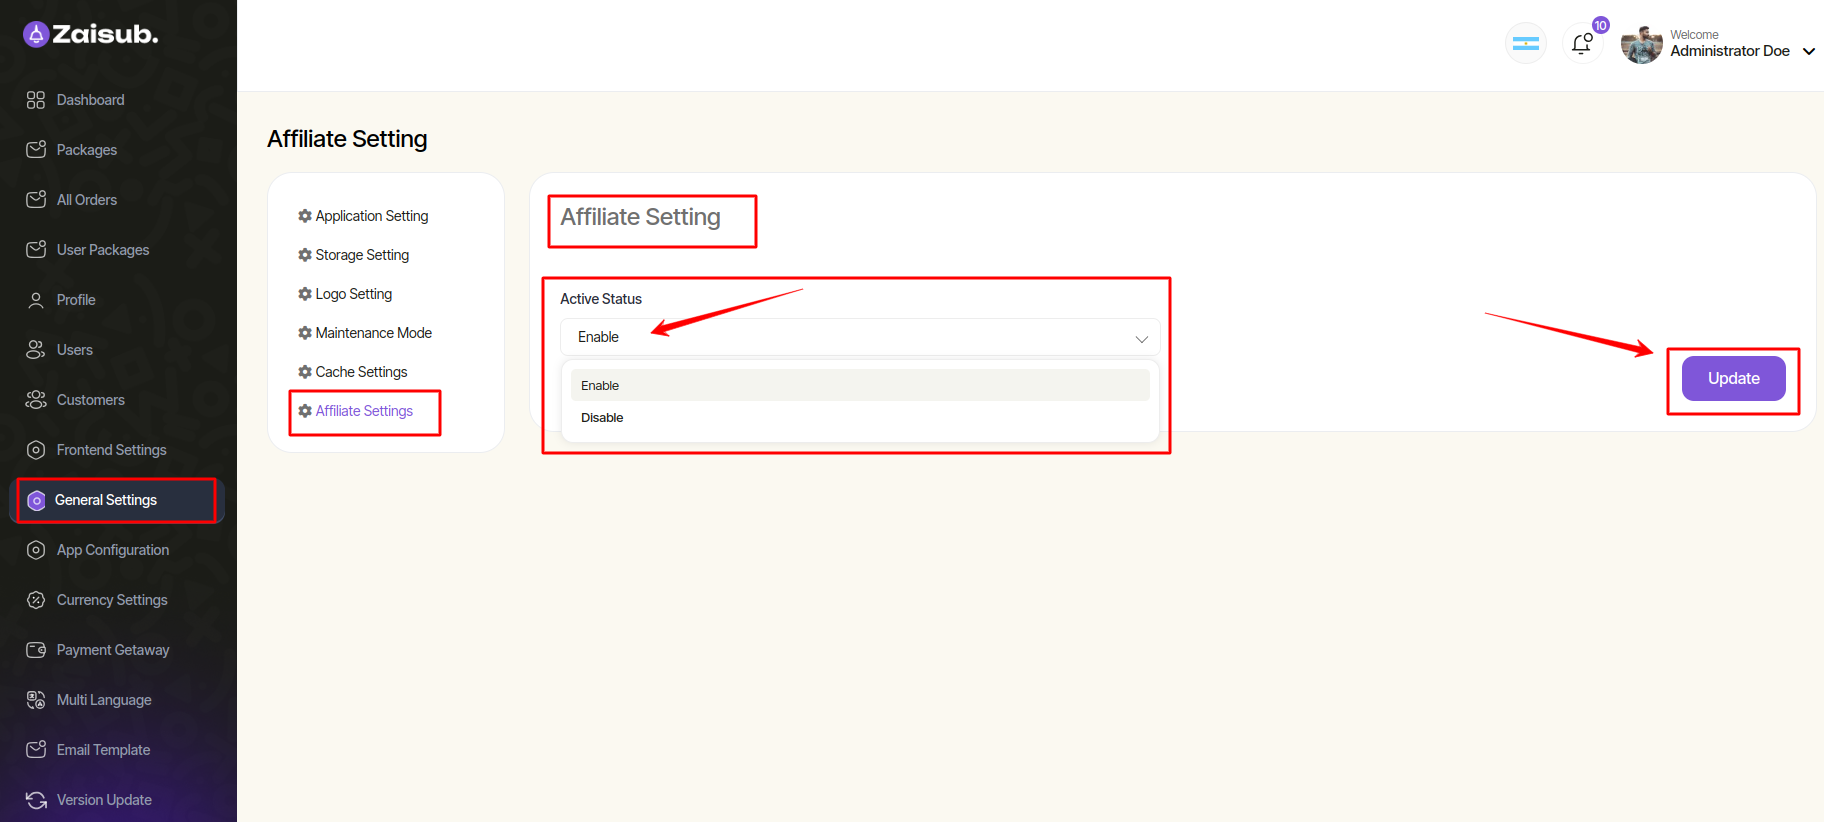
After activating it from the admin panel, the menubar will be shown in the user panel
User Panel Config
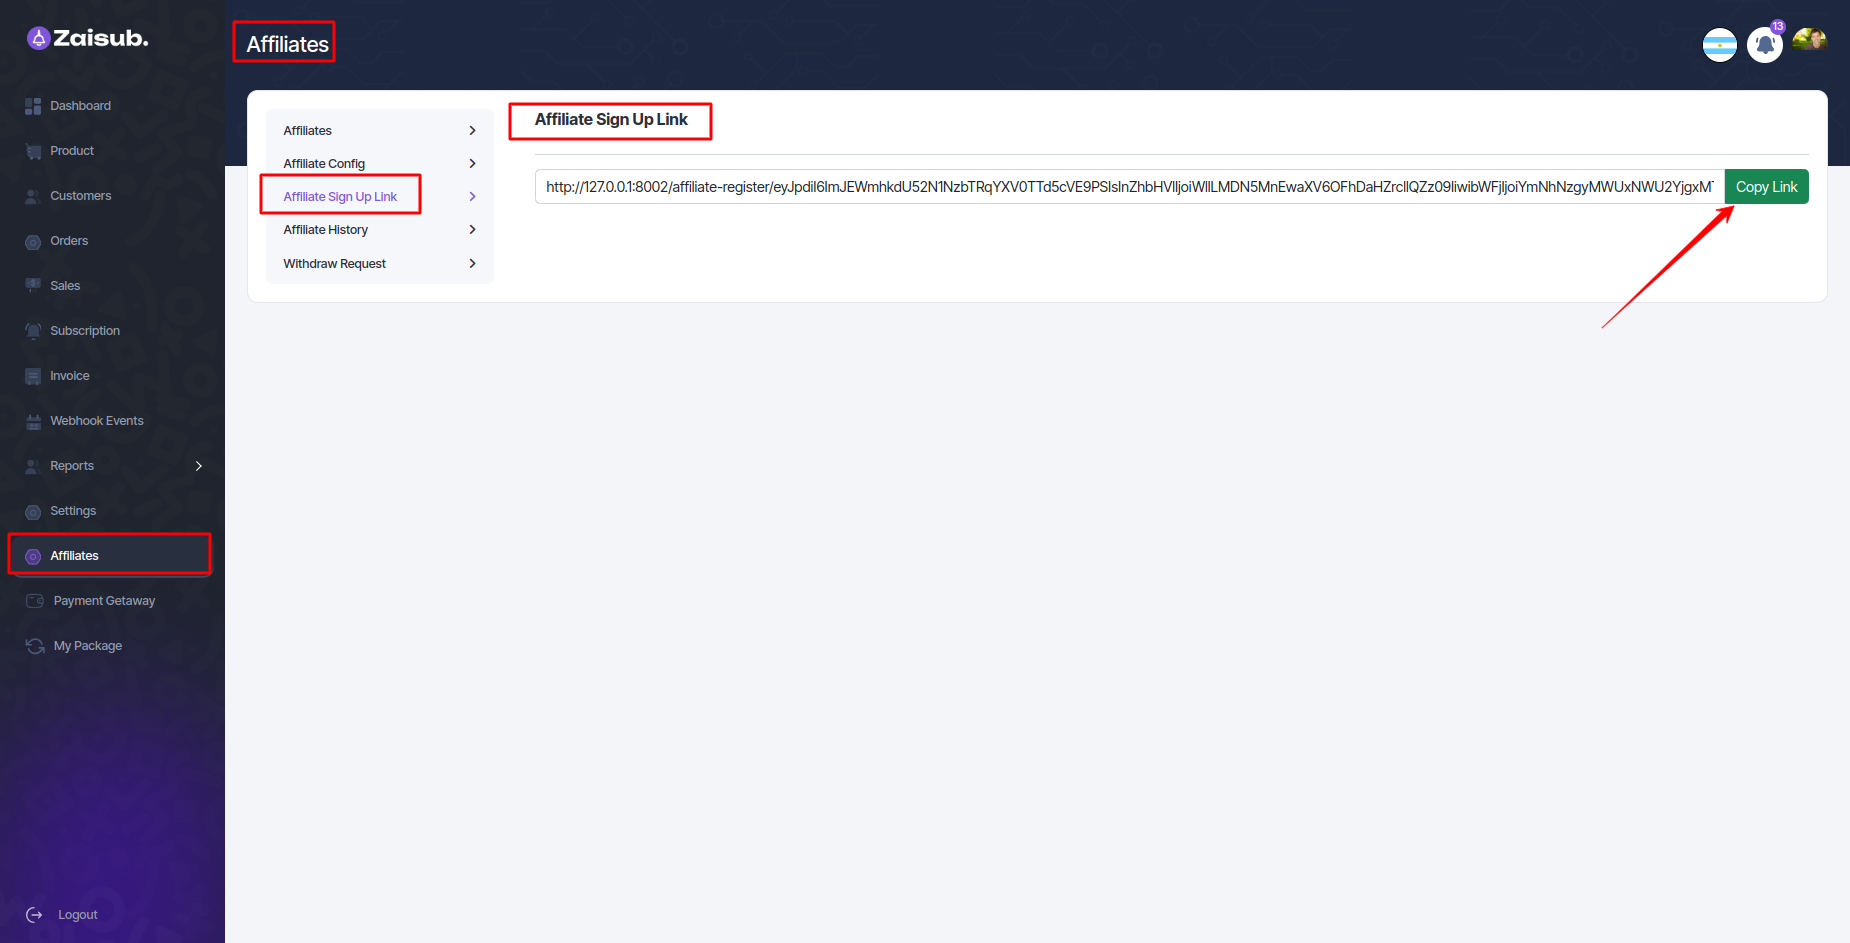
Affiliate Sign Up Link
Accessing the Affiliate Sign Up Link:
- Log in to the platform where the Affiliate Sign Up Link is provided.
- Locate the field or section that displays the unique affiliate sign-up link.
- Highlight and copy the entire URL/link provided in this section.
Opening the Sign-Up Page:
-
Open a web browser (Chrome, Firefox, etc.) on your device.
-
Paste the copied affiliate sign-up link into the address bar of your browser.
-
You'll likely be directed to the affiliate program's sign-up or registration page.
-
Fill in the required information such as personal details, contact information, and any other necessary fields.
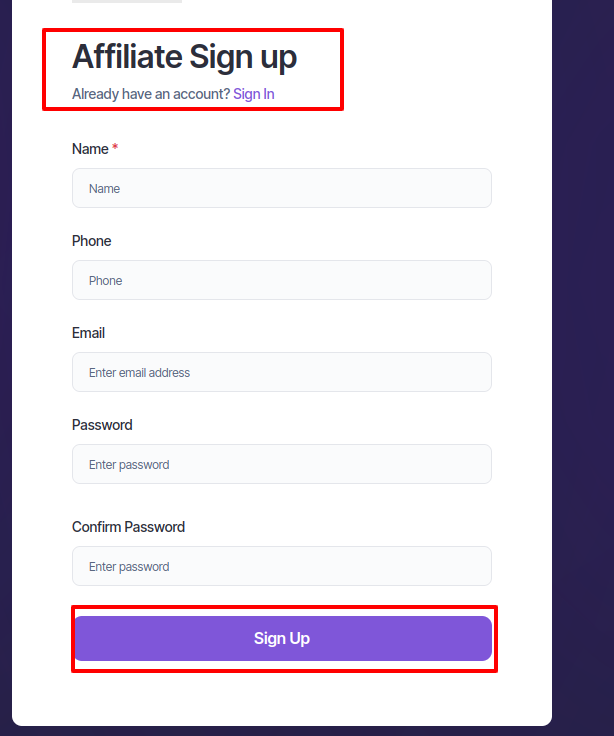
Submission and Confirmation:
-
Once you've filled out the form, submit it according to the instructions provided.
-
Await confirmation of your affiliate registration. This may involve an email confirmation or a notification within the platform.
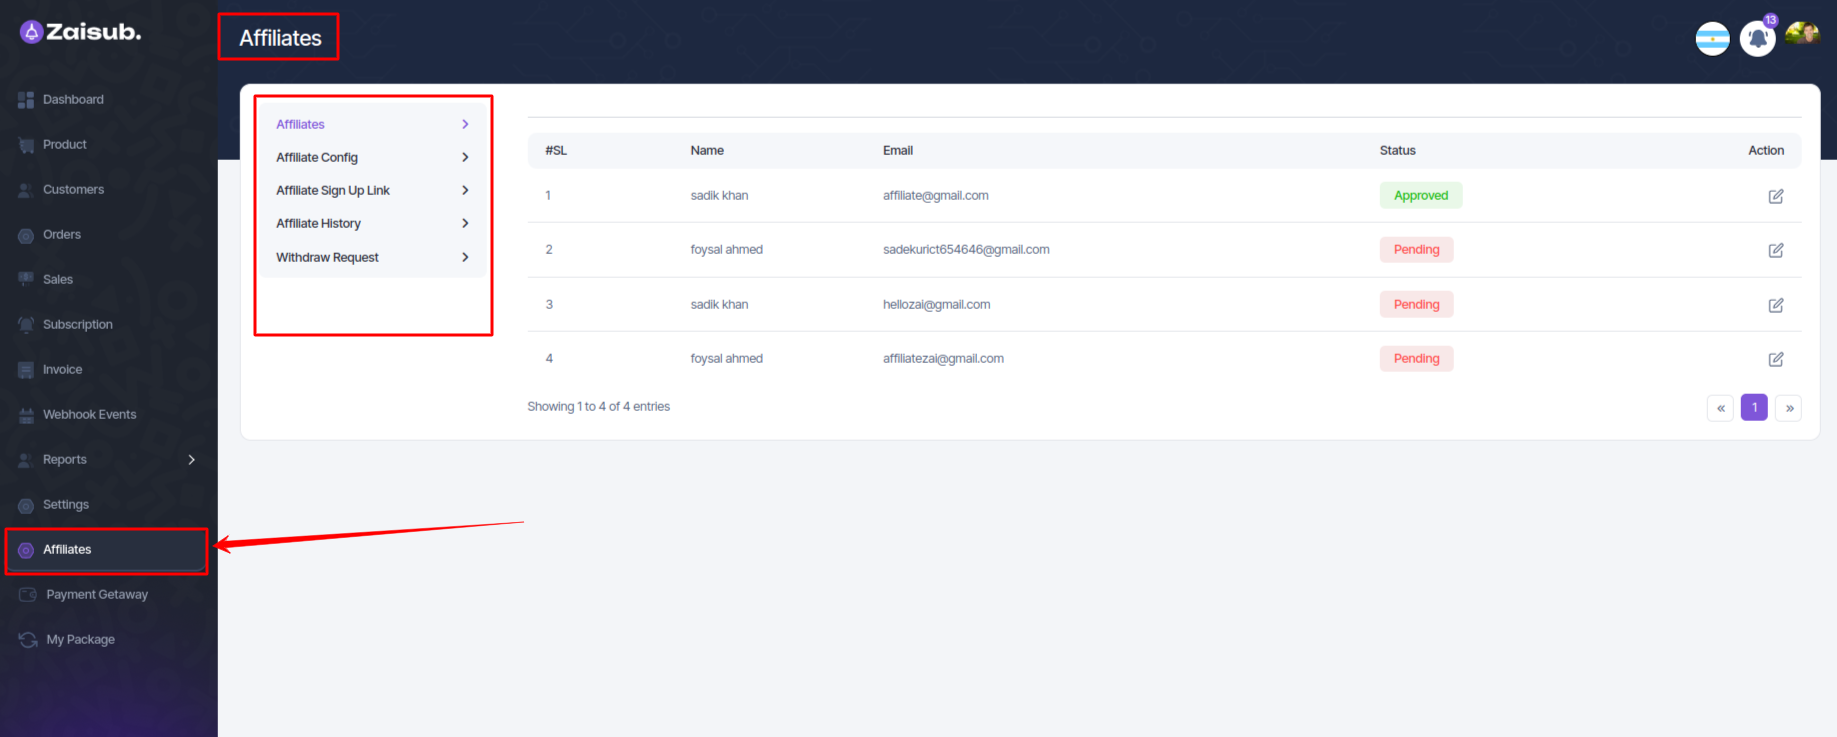
Affiliates
Affiliate History:
-
Track the comprehensive history of affiliate activities, including referrals, earnings, and performance metrics.
-
View detailed reports and analytics to gauge affiliate performance.
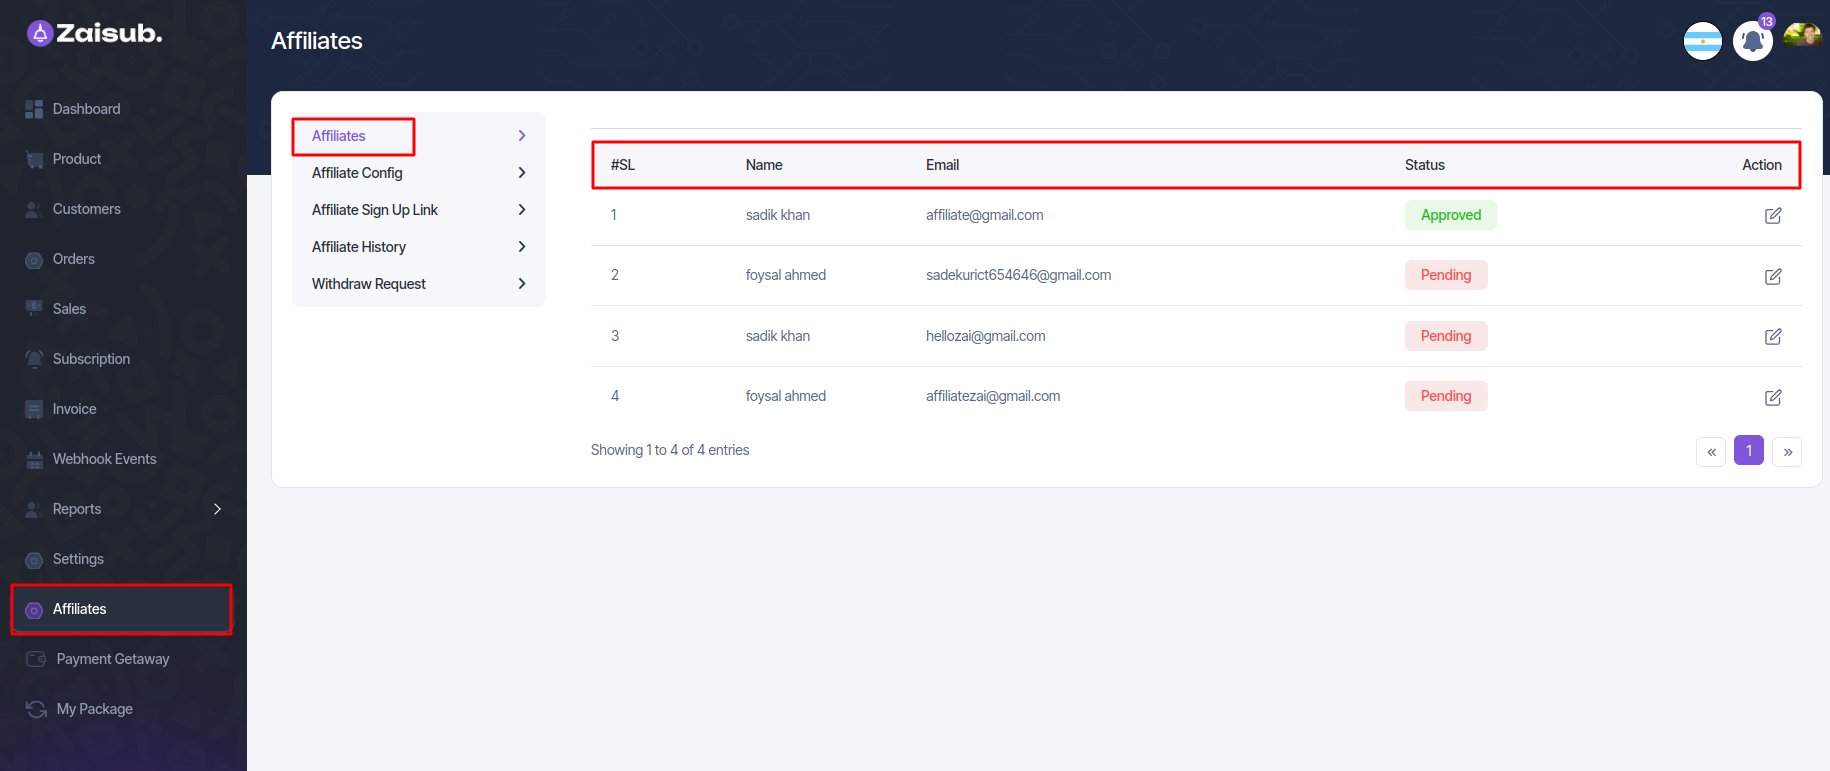
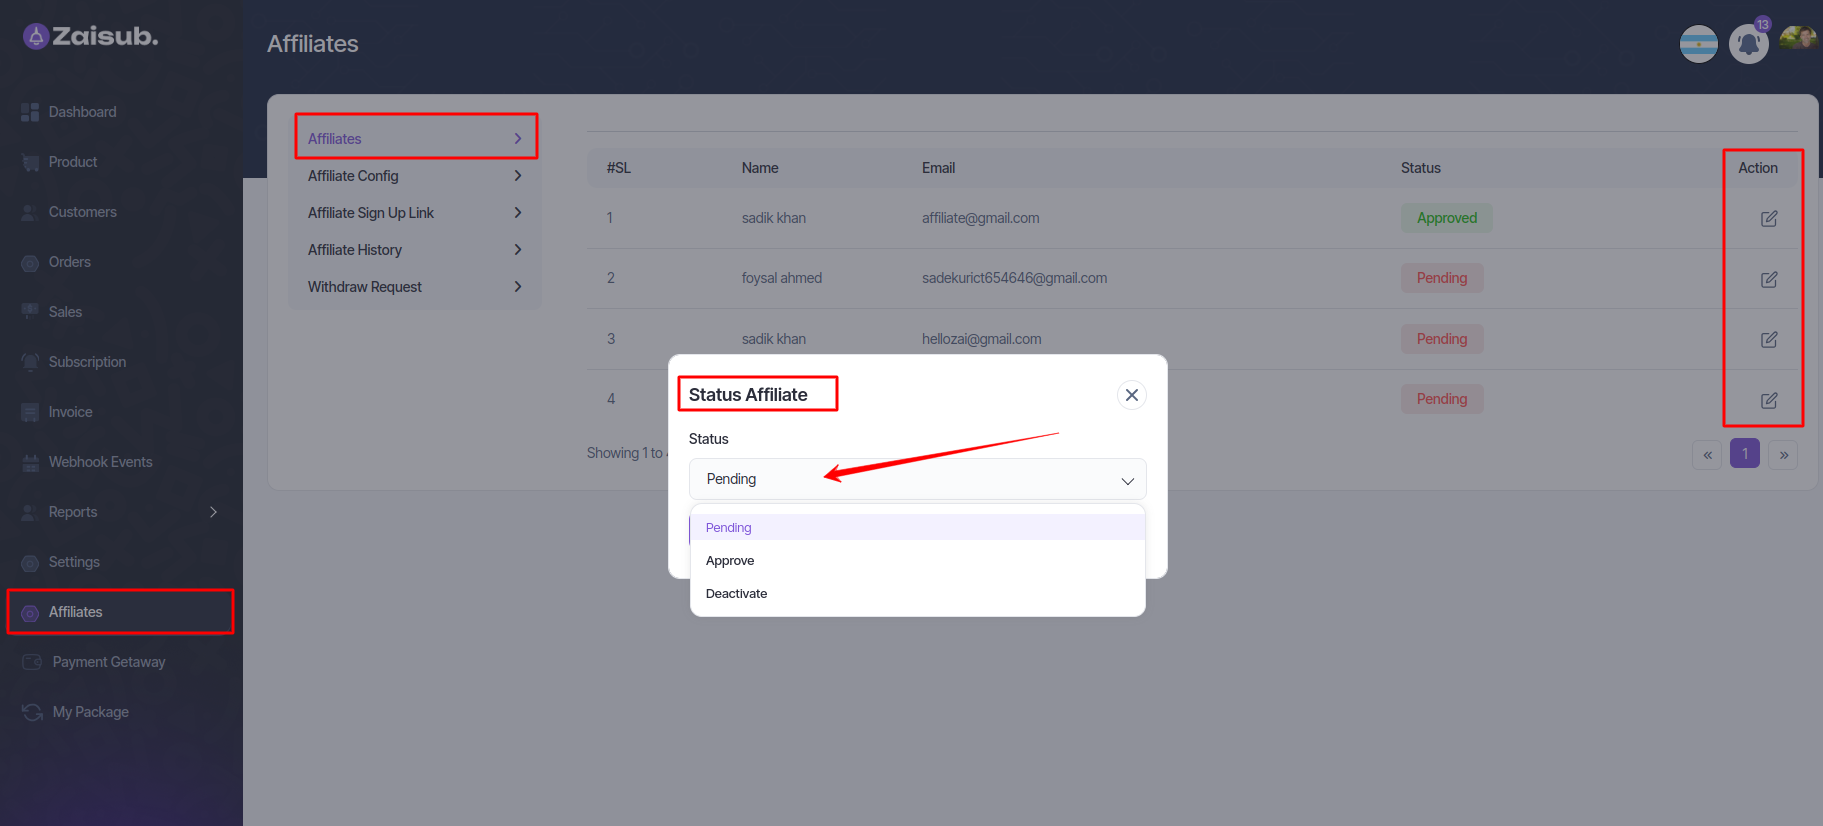
Approval Management:
-
Manage affiliate requests efficiently by accessing the "Pending Approvals" section.
-
Approve or reject pending affiliate requests with ease.
-
Track the status of approvals in real-time.
Affiliate Config
1 Custom Title:
- Users can set their own title or designation within the affiliate program, which may appear in reports, referrals, or the affiliate dashboard for identification purposes.
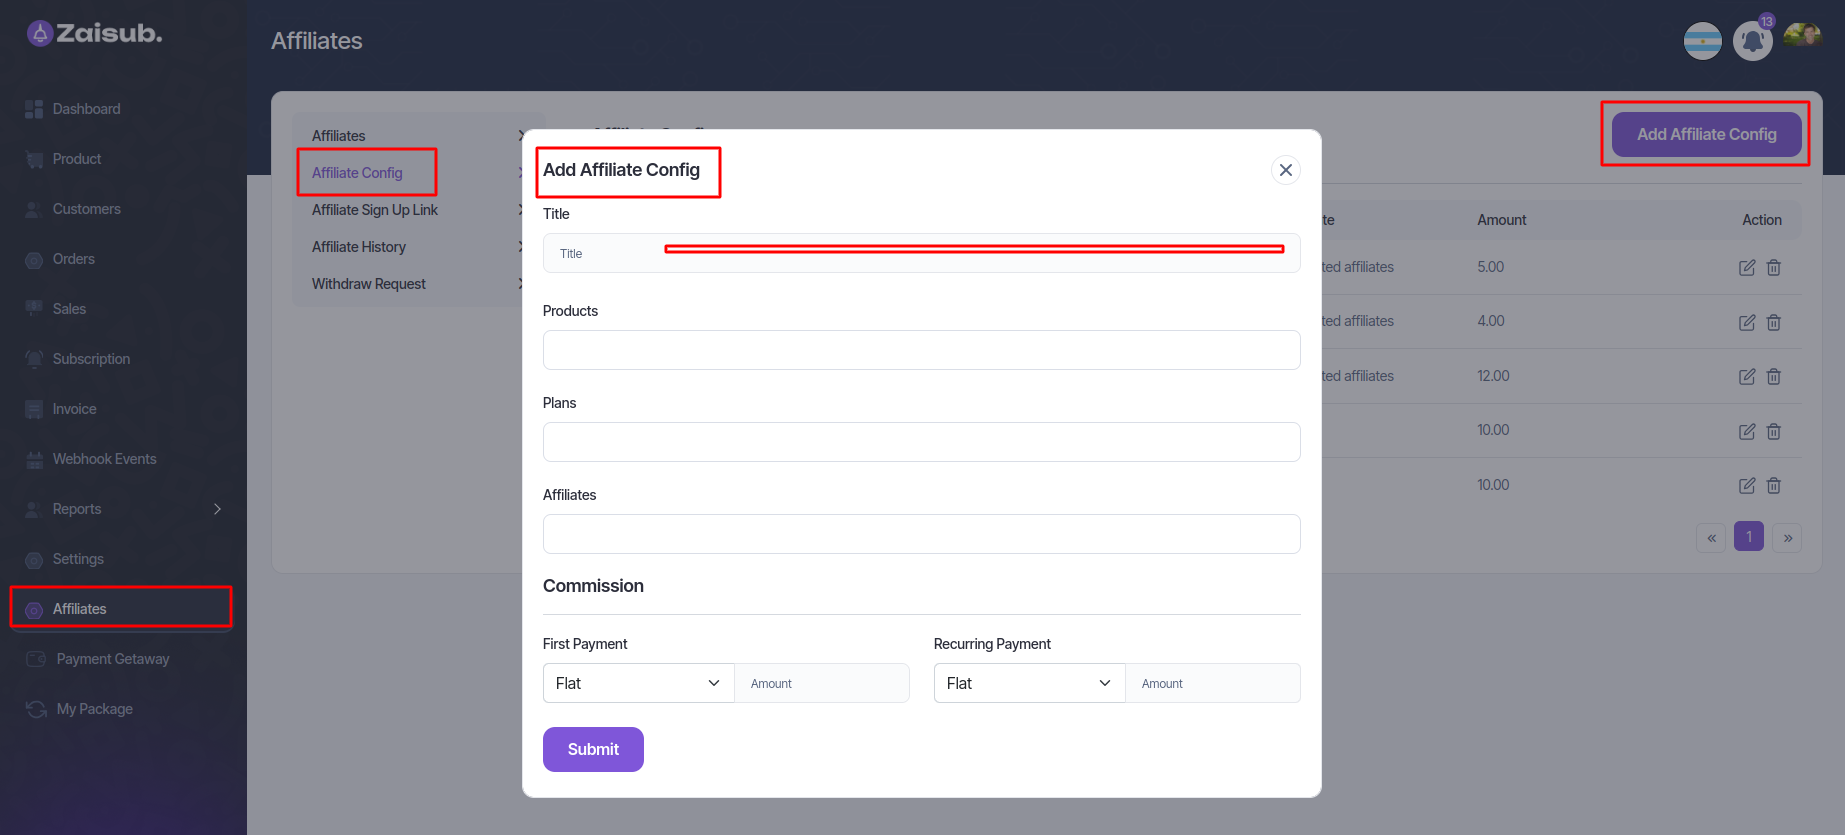
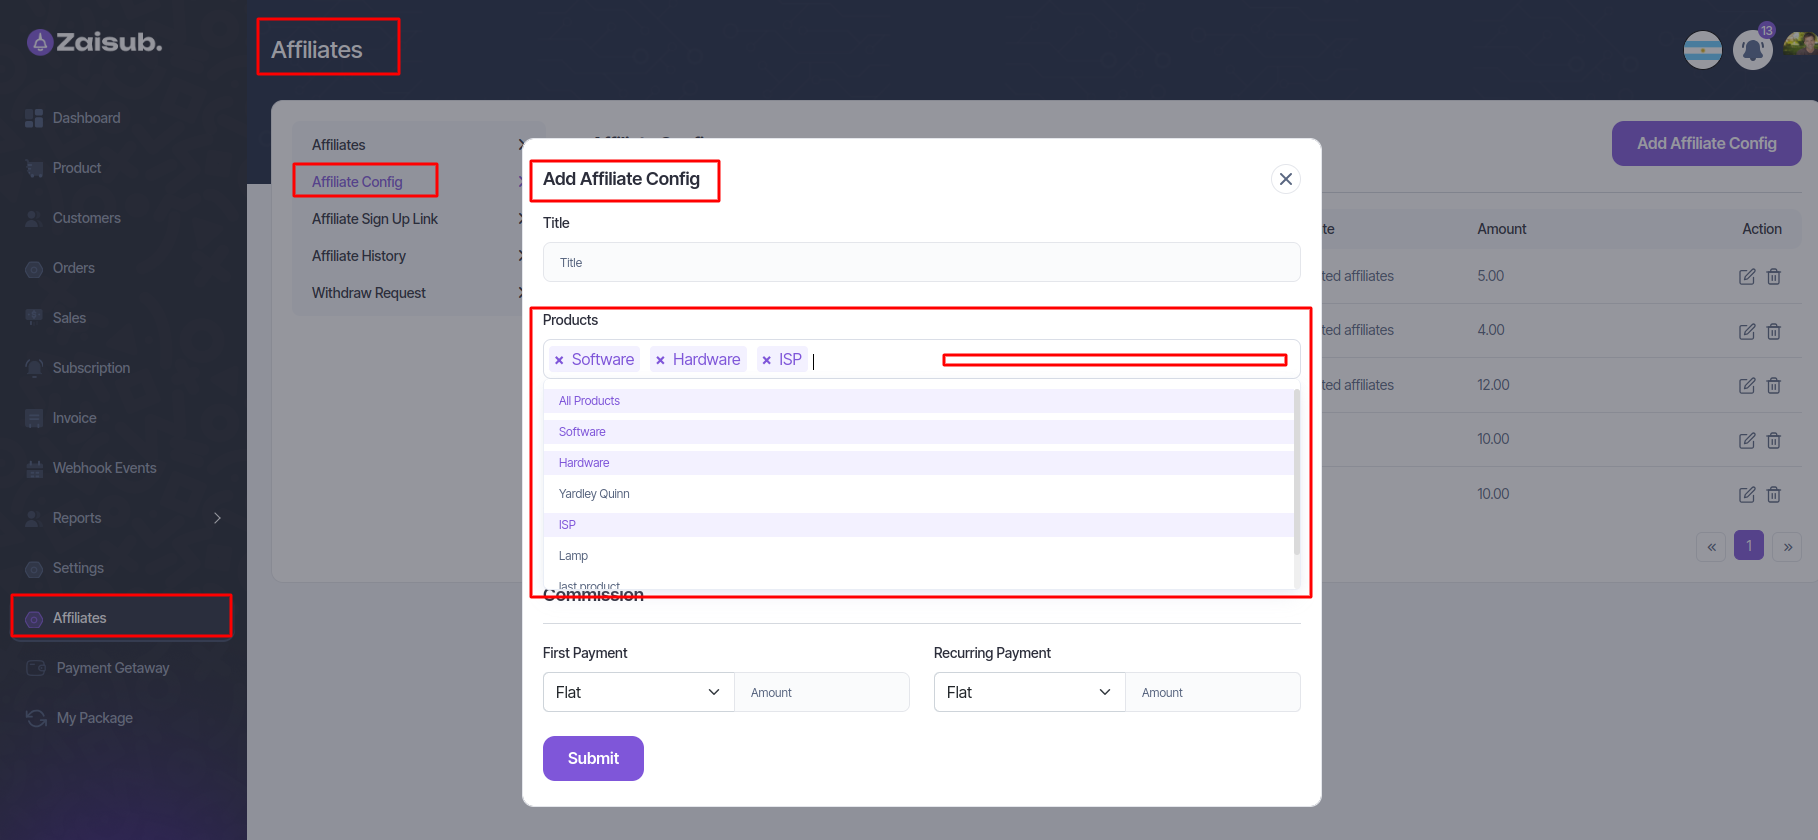
2 Products and Plans:
- Admins or users can specify the products or services that affiliates will promote. This could involve listing available products, subscription plans, or specific offerings eligible for the affiliate program.
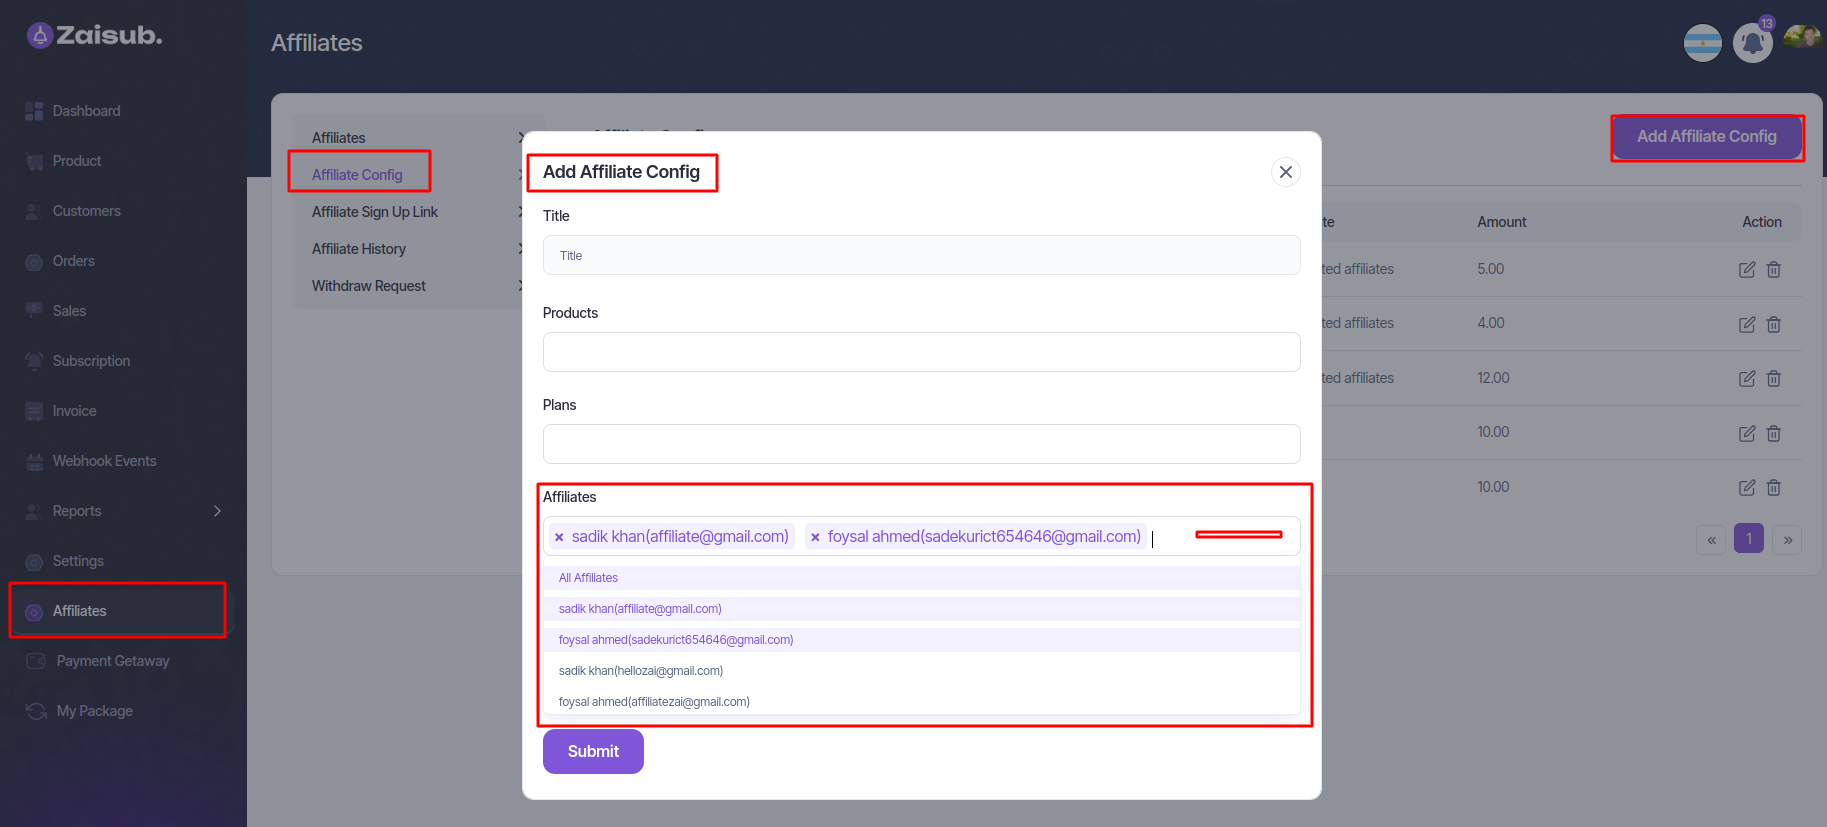
3 Affiliate Identification (User's Gmail):
- This feature allows admins to link a user account to an affiliate through their Gmail or email address, associating the user with the affiliate program.
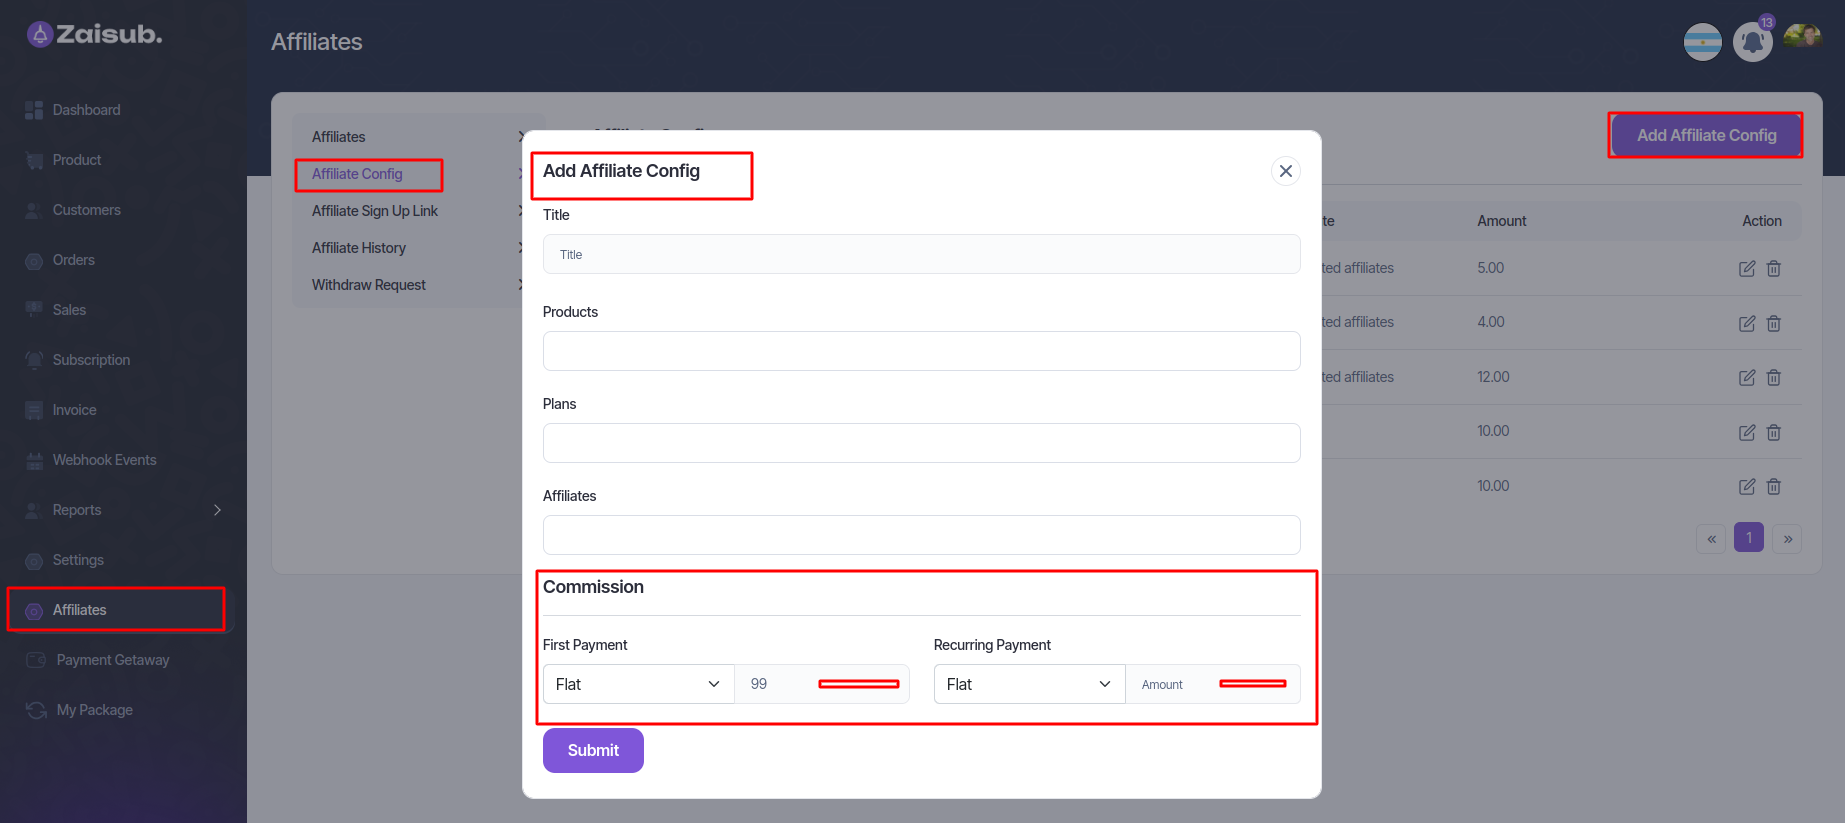
4 Commission Rates:
-
First Payment Percentage: Users can set the commission percentage earned by affiliates on the first payment made through their referral link. This incentivizes affiliates for acquiring new customers.
-
Recurring Payment Percentage: Admins can define the percentage of commission affiliates receive on subsequent or recurring payments made by the referred customer, usually during renewals or subsequent purchases.
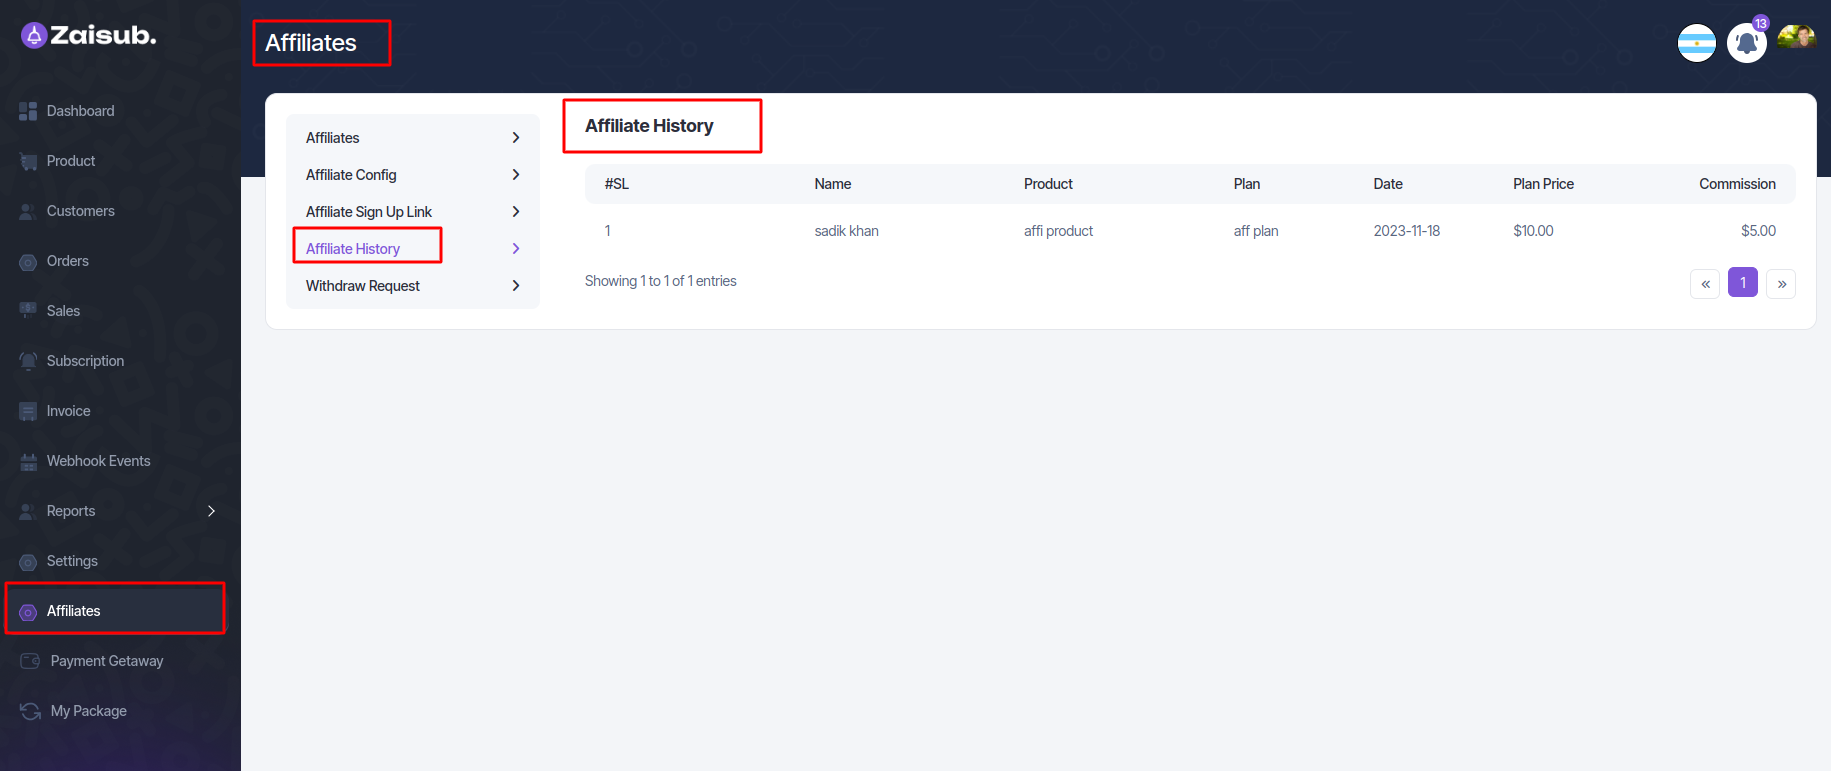
Affiliate History
- In the panel, you'll find details about transaction identifiers, affiliate names, product/service descriptions, associated plans, transaction dates, plan costs, and affiliate earnings
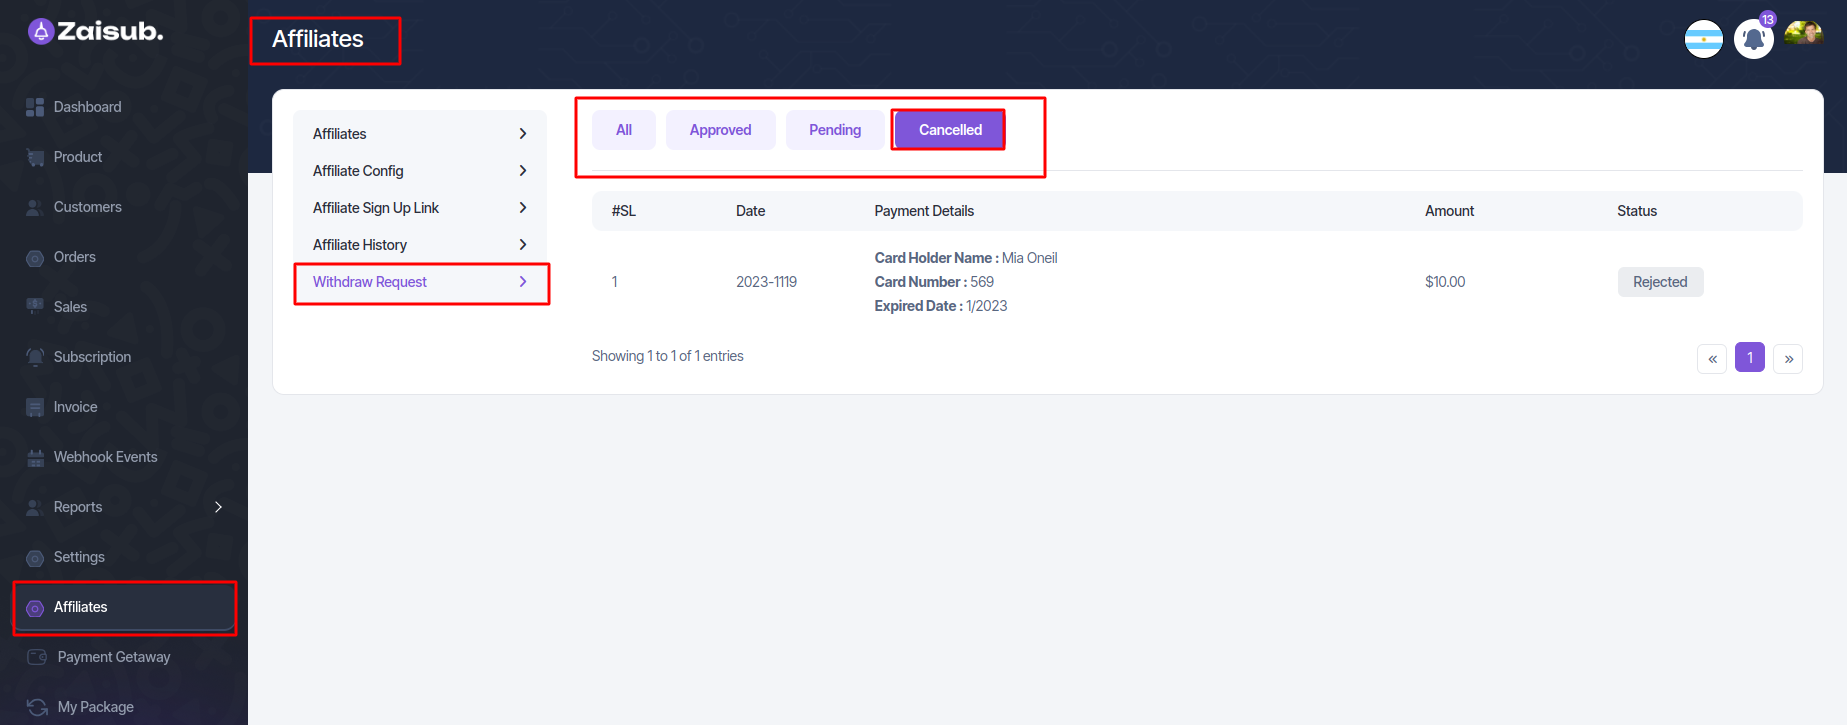
Withdraw request
- In this panel user can see all check out or affiliate purchase history.
- You can see all the information of the order in four steps.
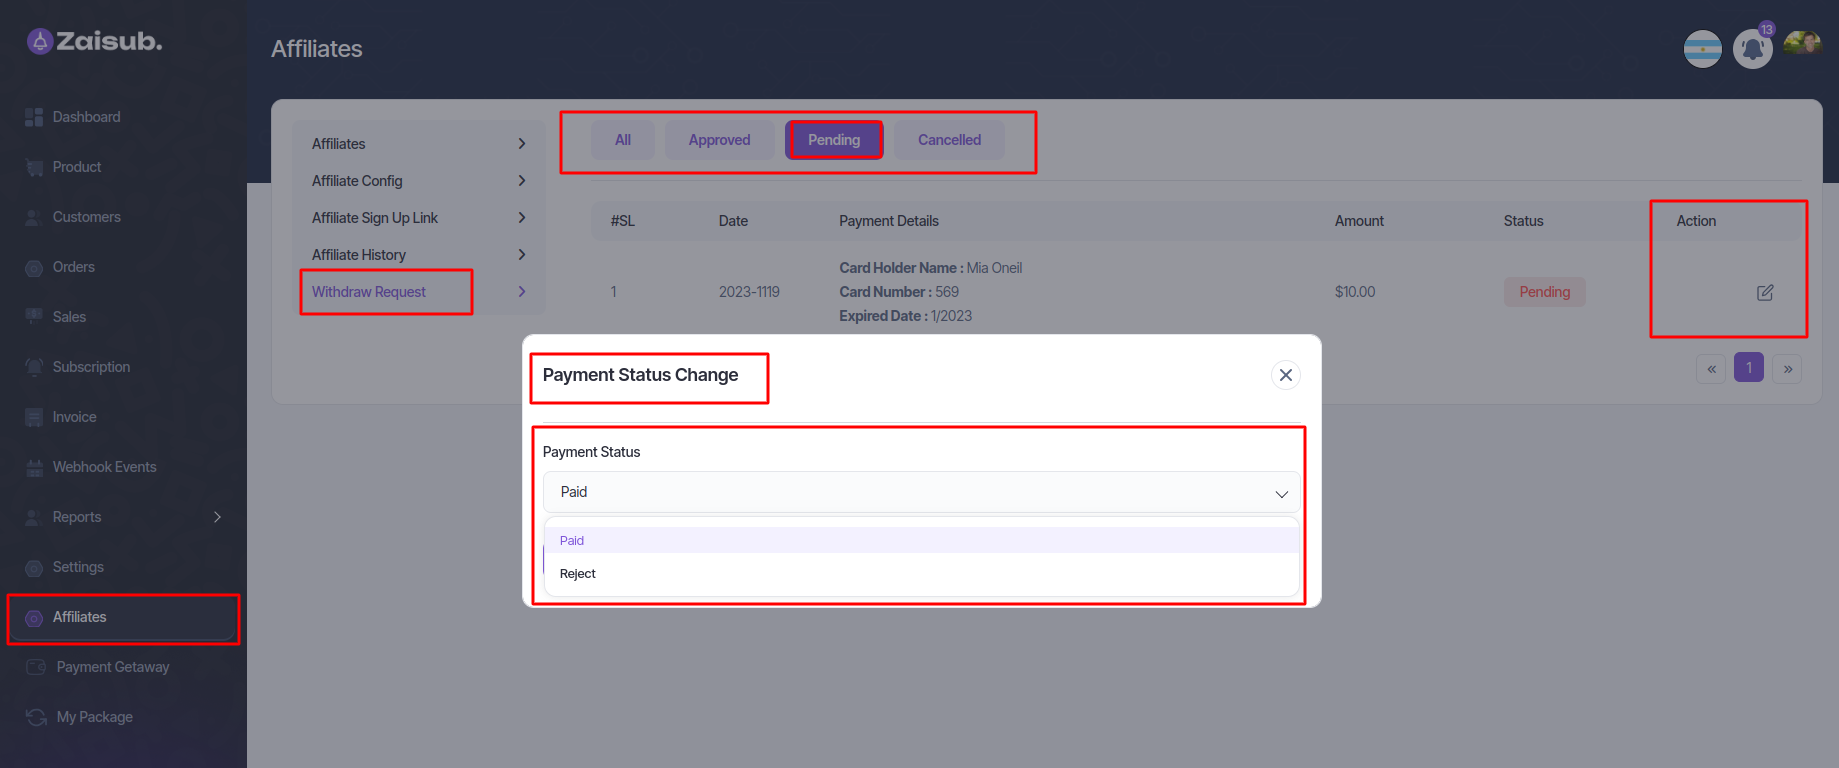
-
If you click on edit button you can pay or cancel the pending affiliate. Or you can see all that information in these steps:
-
All
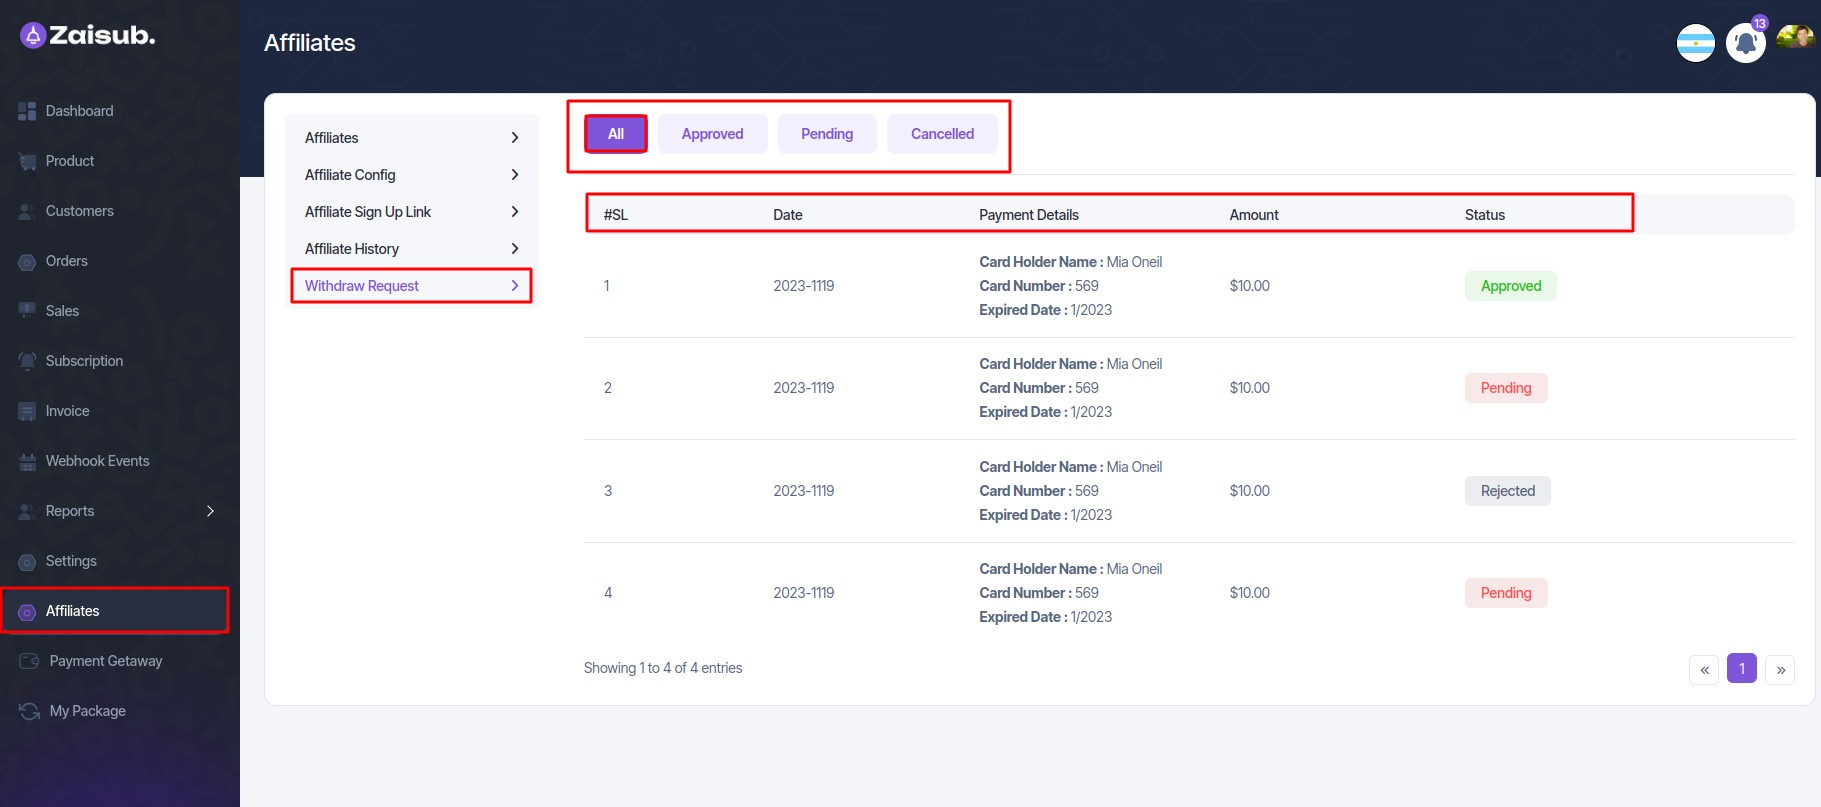
- Approved
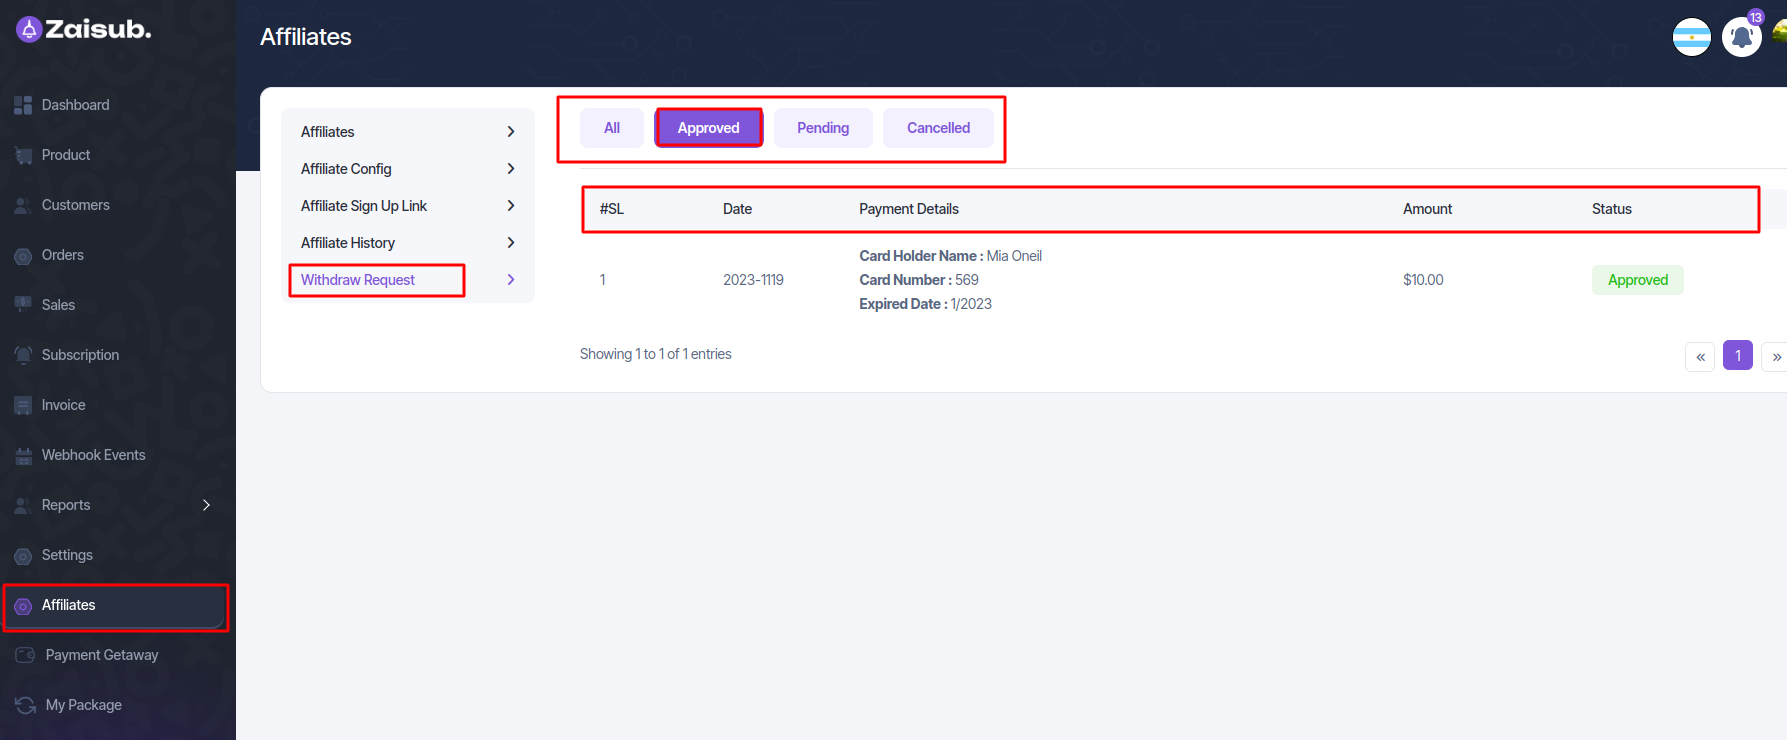
- Pending
- Cancel
Affiliate Panel Config
Affiliate Link
-
View Affiliates Assigned:
-
Access the "Affiliate Link" section within your user panel.
-
Here, you'll find a list displaying the number or details of affiliates associated with your name or account, providing an overview of your affiliate network.
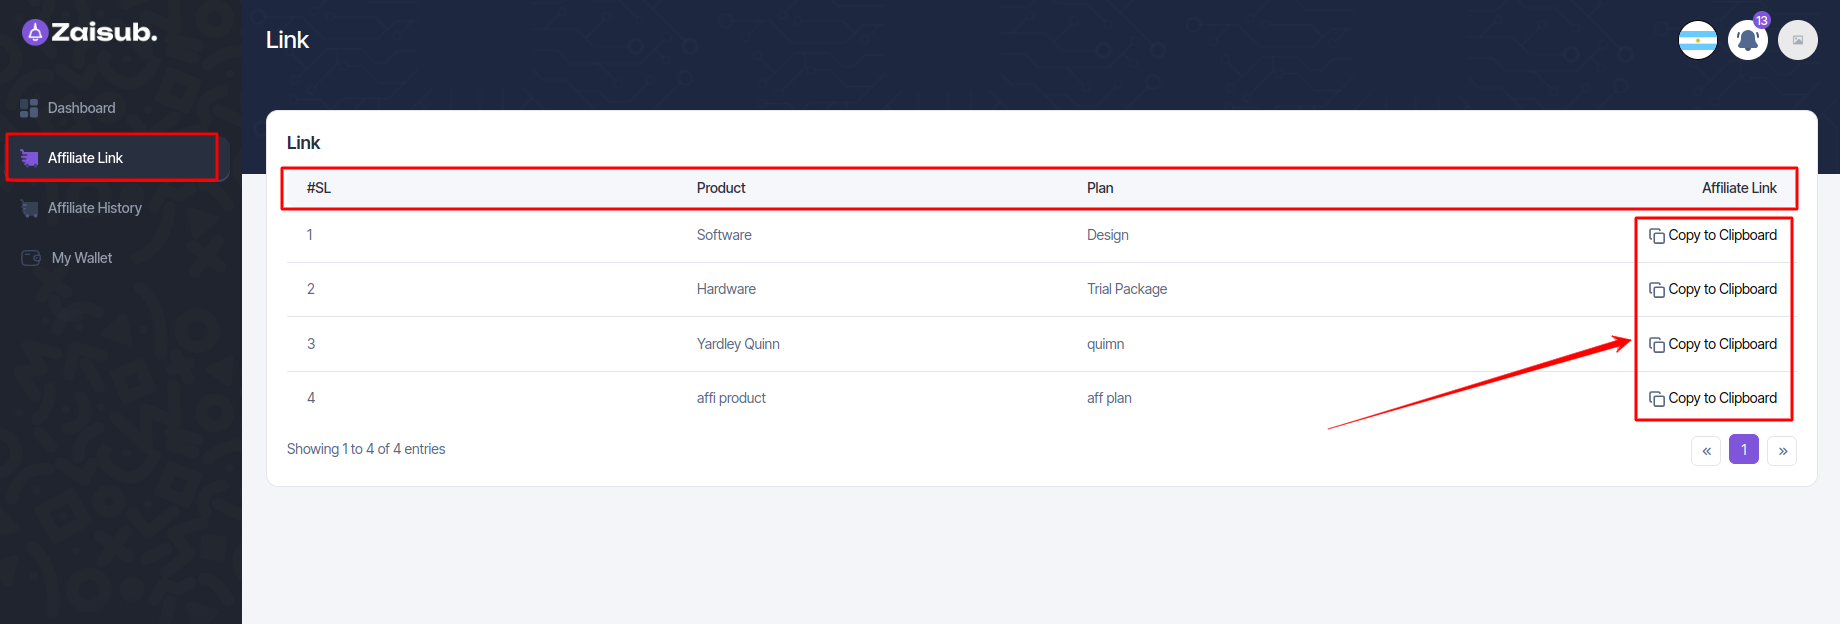
-
Share the Link for Purchases:
-
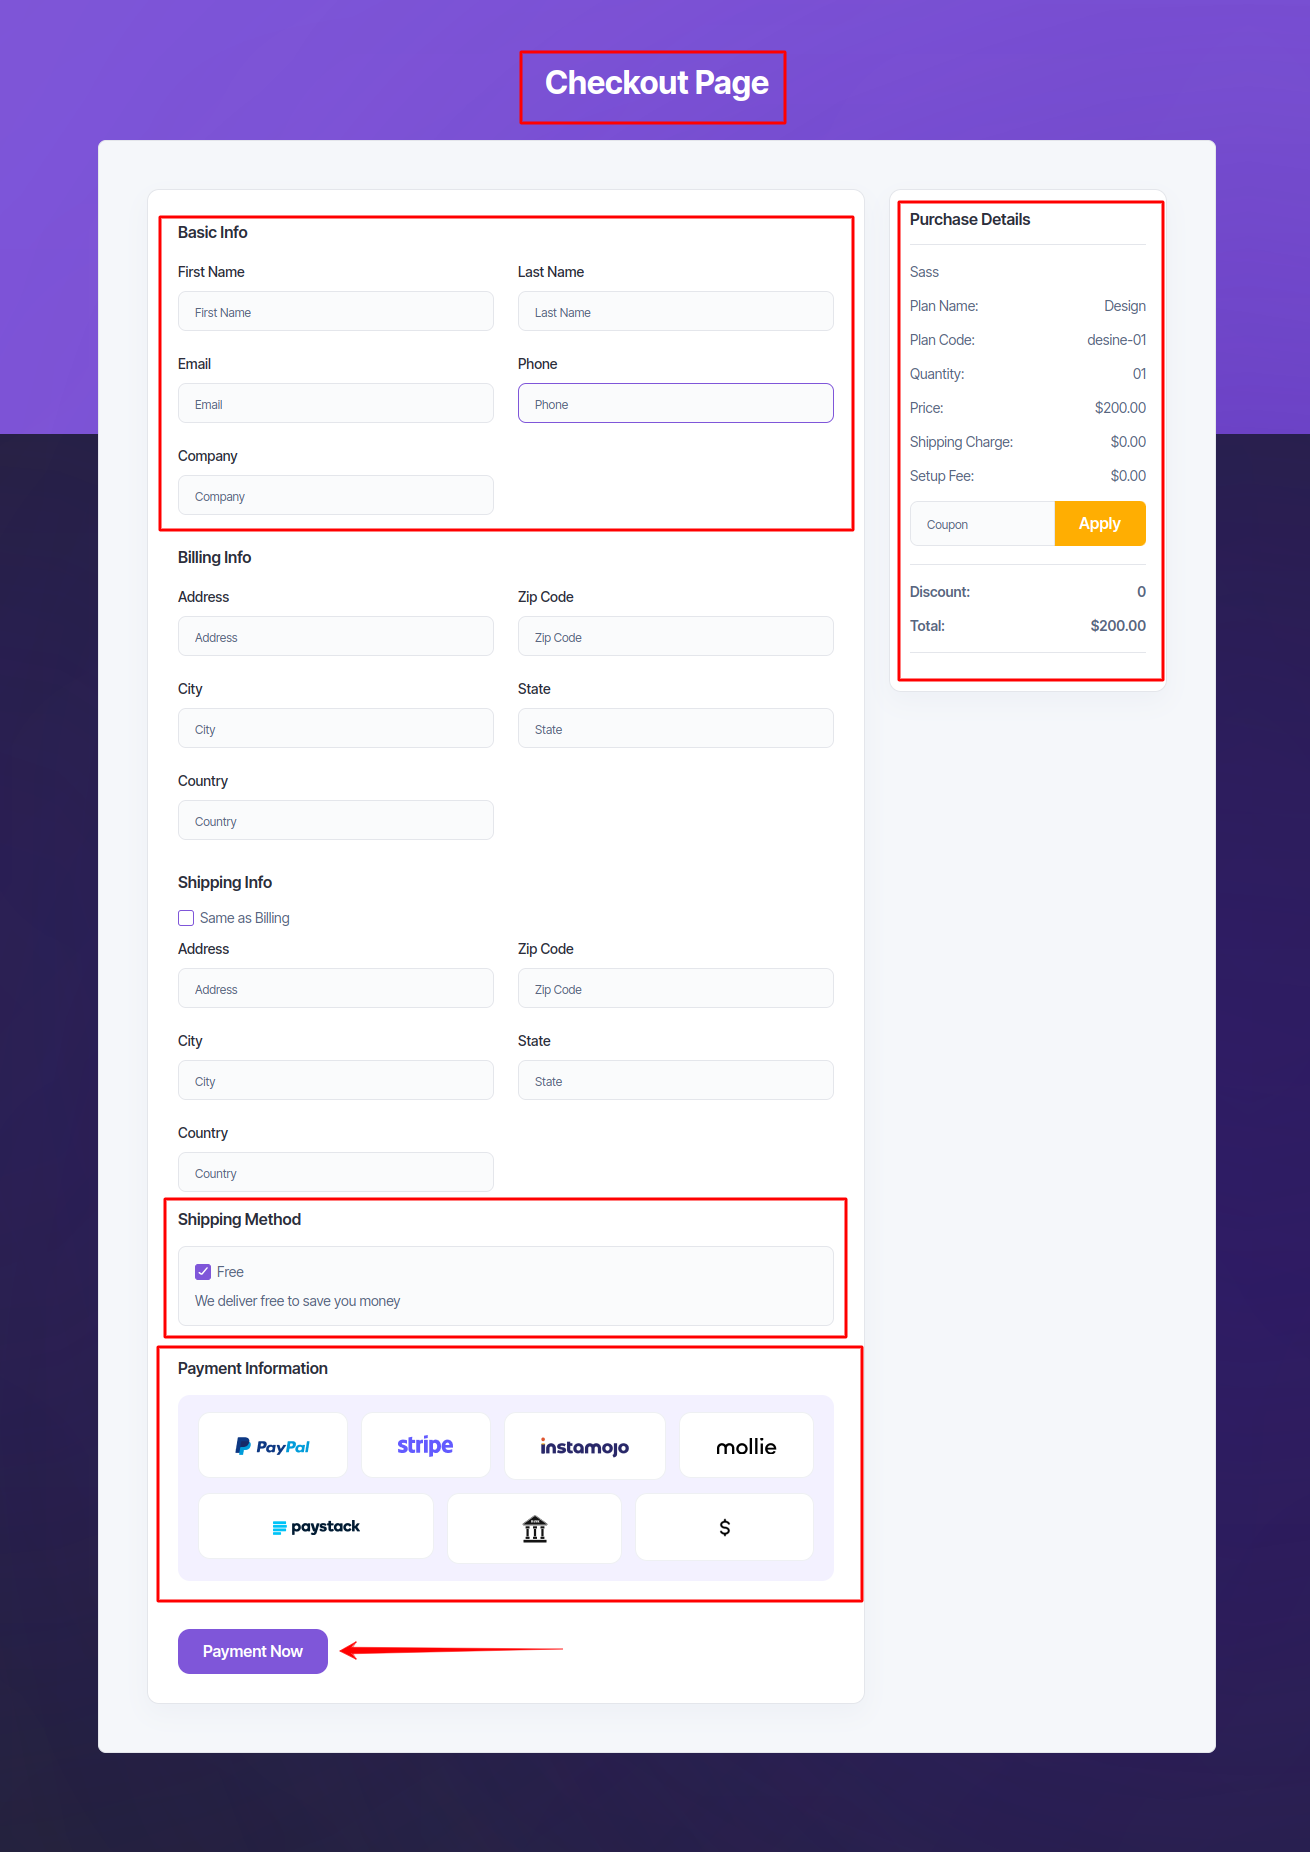
When you share this affiliate link with potential customers, they will be directed to the checkout page upon clicking it.
-
Individuals can proceed to purchase a plan or product through this link. Any transactions completed via this link will be credited to you within the affiliate program, ensuring you receive recognition for the sale.
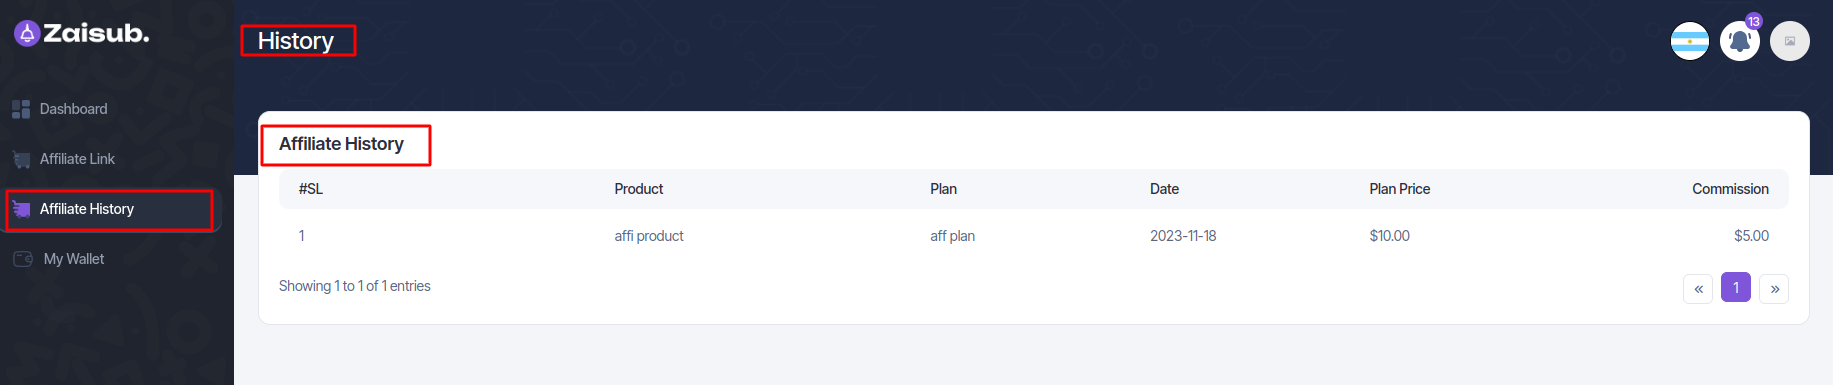
Affiliate History
- In the panel, you'll find details about transaction identifiers, affiliate names, product/service descriptions, associated plans, transaction dates, plan costs, and affiliate earnings
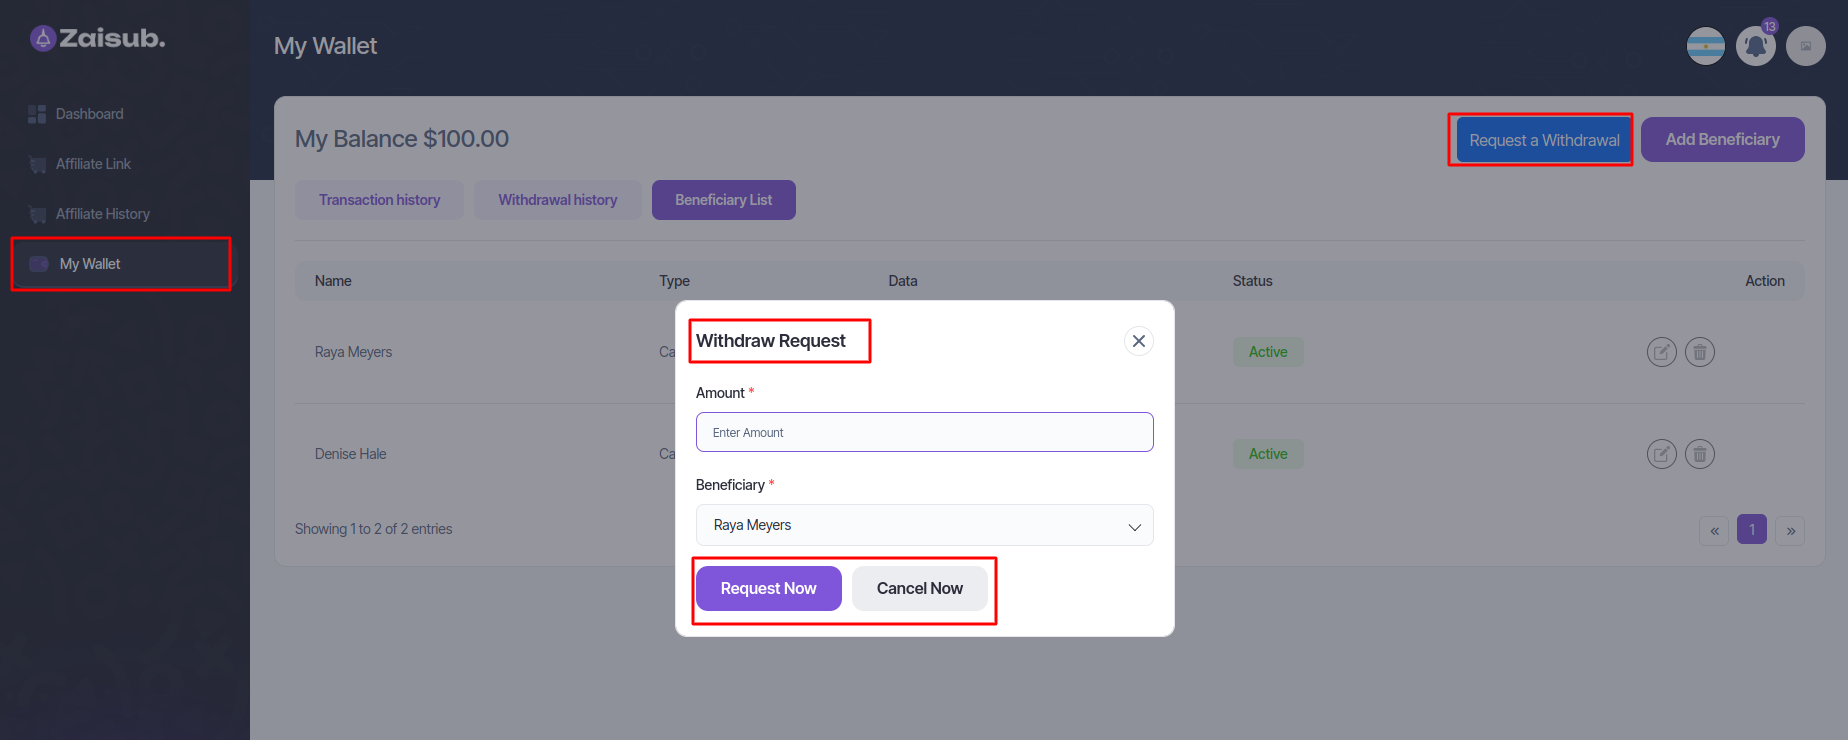
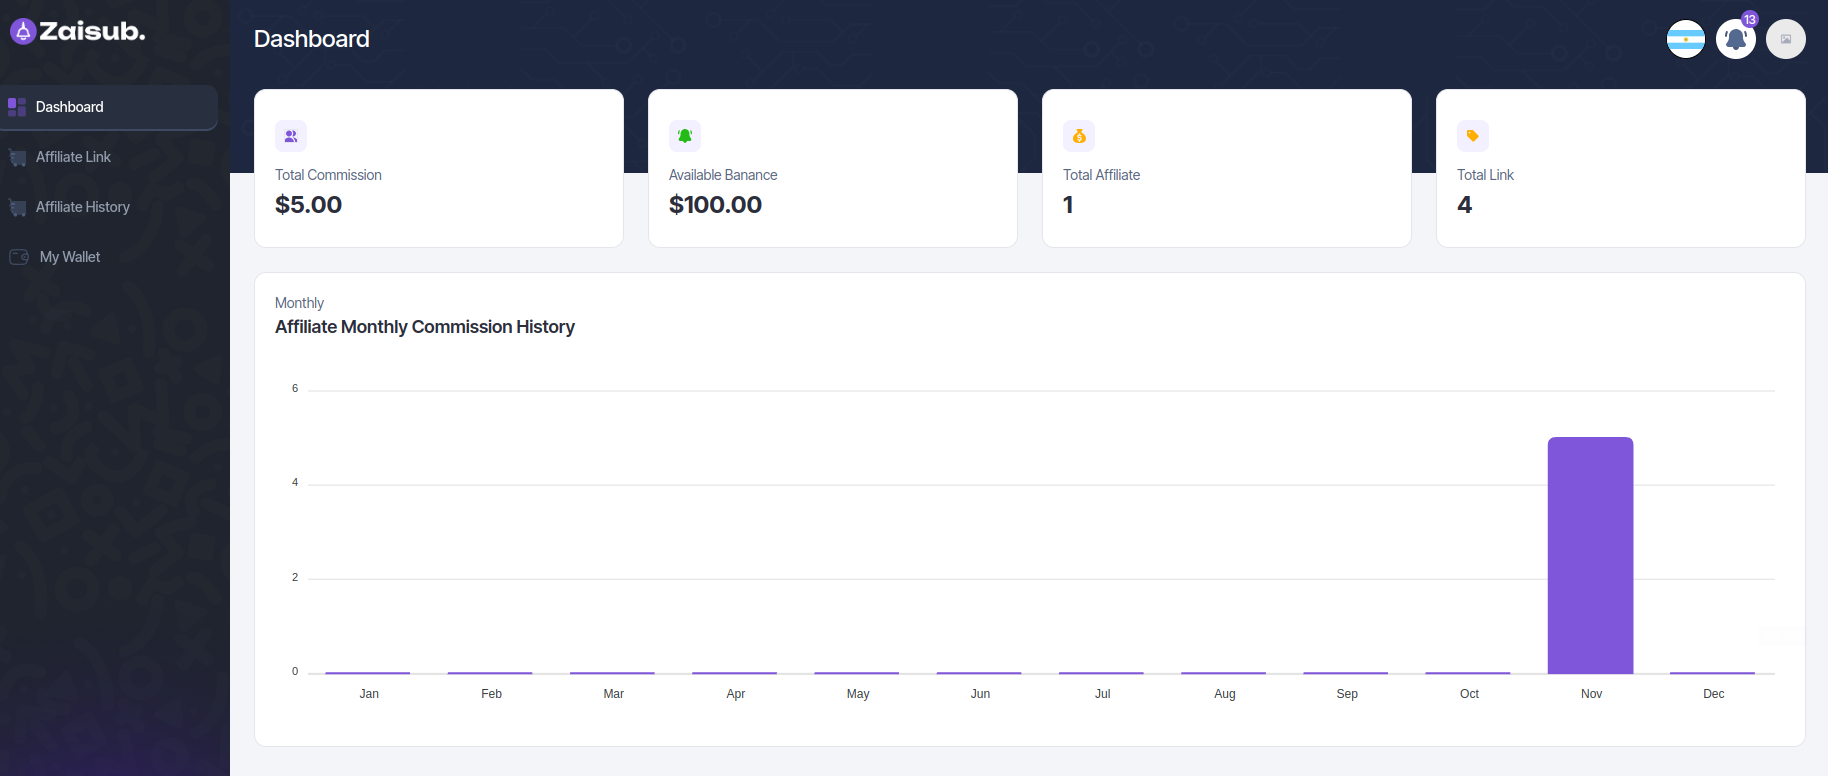
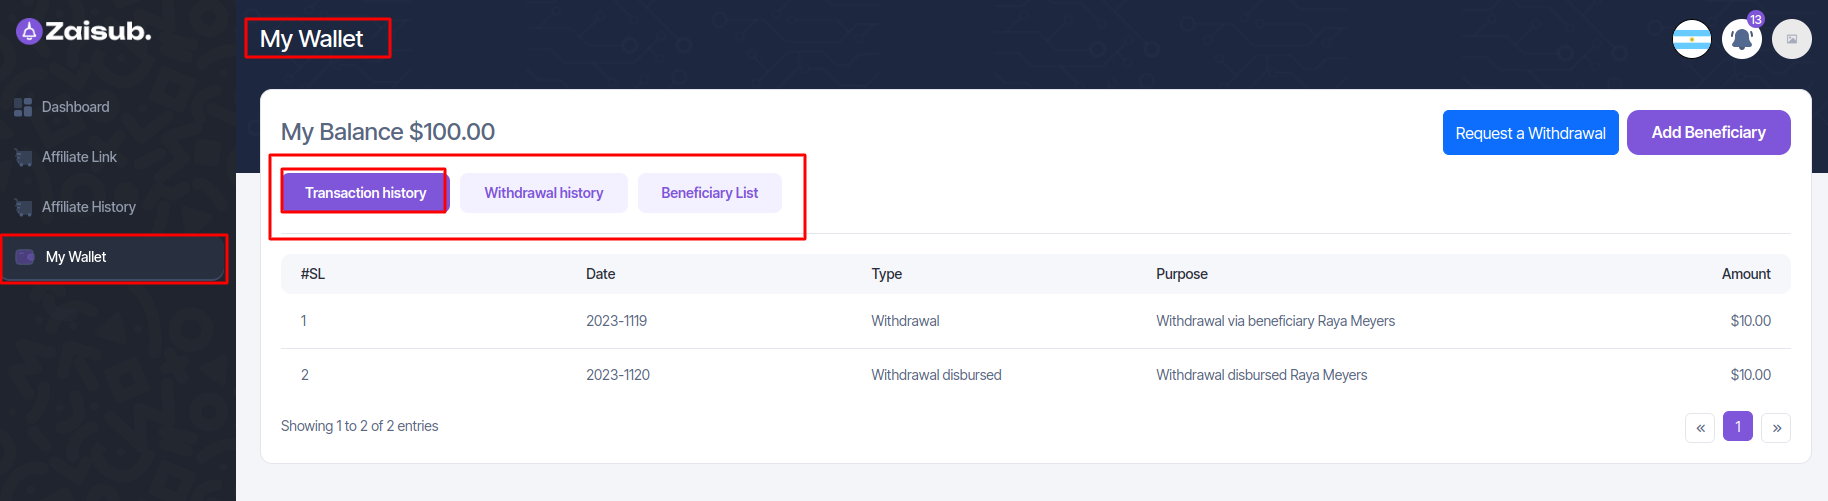
My Wallet
-
Transaction History:
-
The Transaction History section provides a comprehensive record of all payment transactions. It displays a detailed list of incoming and outgoing payments, showcasing the date, amount, recipient/sender, and transaction status, facilitating easy tracking of all financial activities within your account.
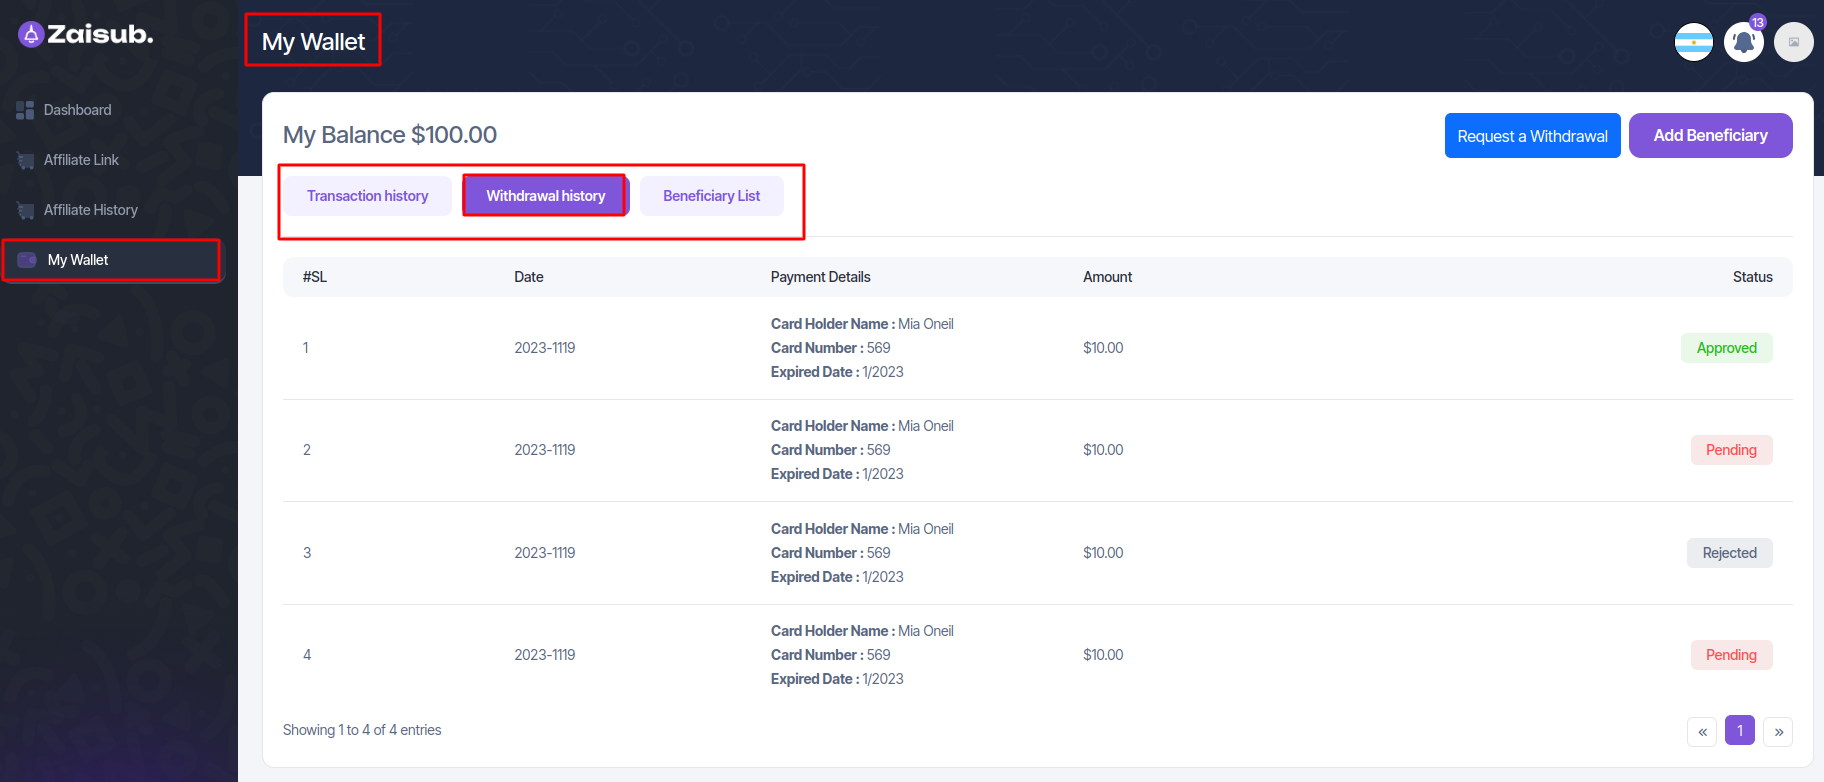
2.Withdrawal History:
- Within the Withdrawal History section, users can view a chronological list displaying all previous withdrawal requests and their statuses. This list includes details such as the withdrawal date, amount, payment method used, and the status of each withdrawal request (e.g., pending, approved, or completed).
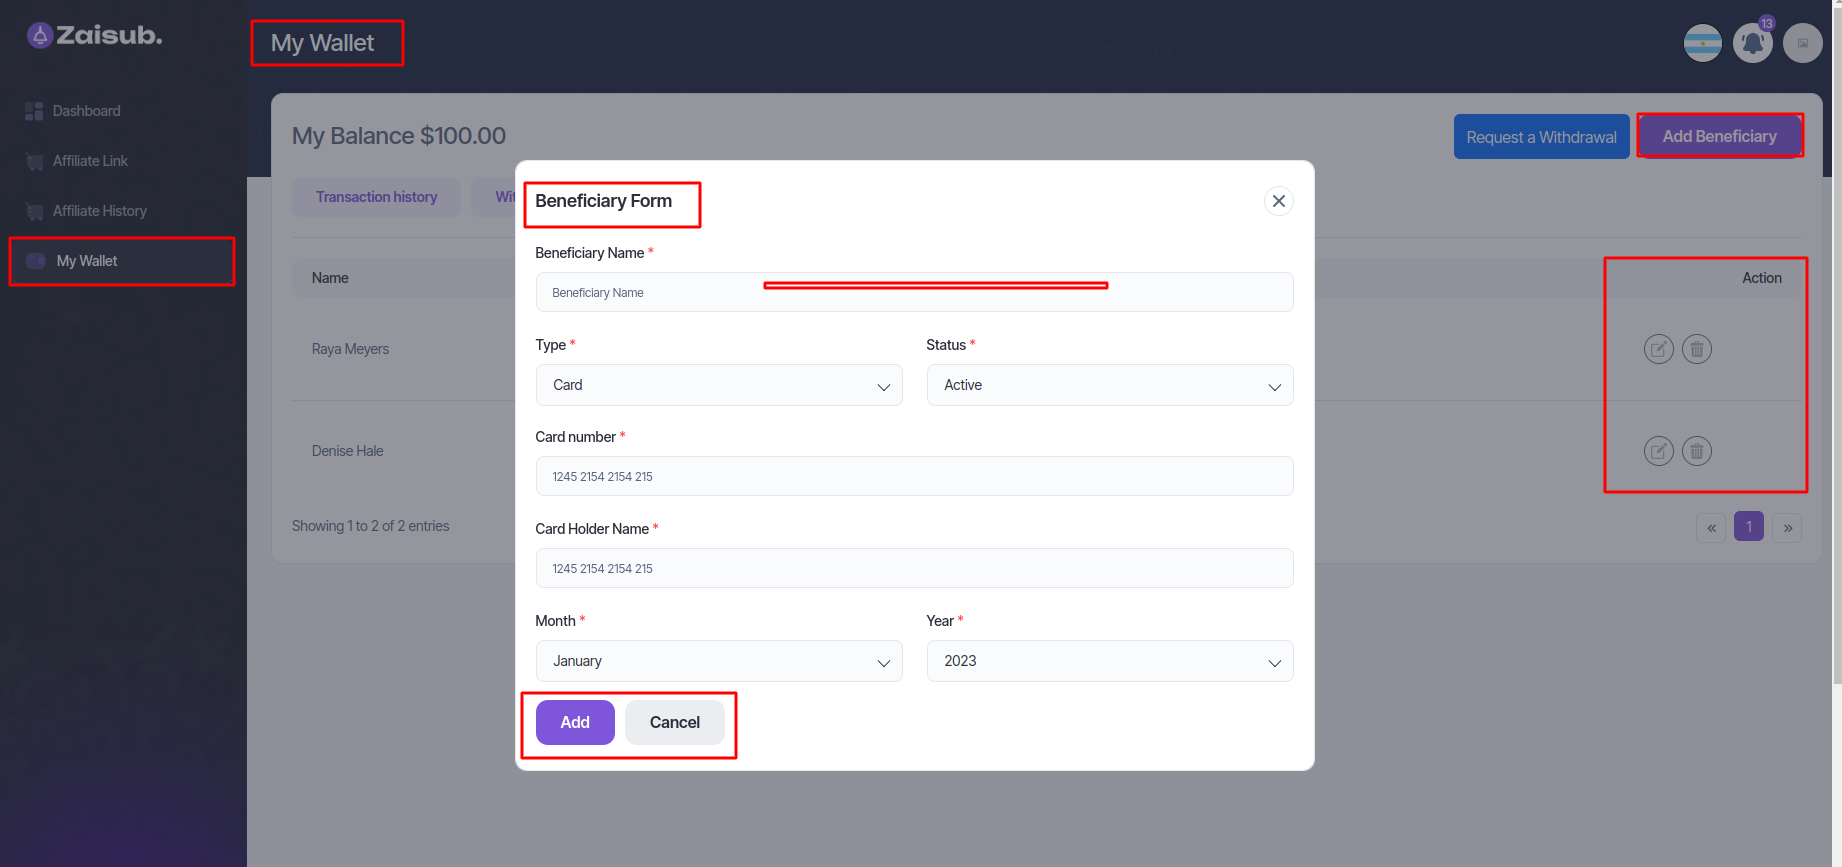
3.Beneficiary List:
- The Beneficiary List presents a record of individuals or entities previously added as beneficiaries for payments. It showcases a collection of beneficiaries along with their details (e.g., name, account information). This feature also allows users to add new beneficiaries, enabling convenient and secure payments to these designated recipients in the future.
4.Withdrawal Request Process Overview
Affiliates can request withdrawals through their dashboard by specifying the amount and payment method. Admins review and approve these requests for accuracy, and upon approval, withdrawals are processed via the chosen payment method, with users notified of the request status